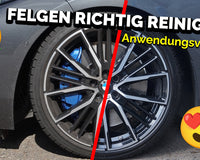
Step 1: Spray on rim cleaner
The first thing to do is clean the rims. This is very simple and should always be done with a good, PH-neutral rim cleaner. It is always important to observe the exposure time specified by the manufacturer so that the rim cleaner has enough time to do its job.
In detail, this means that you briefly check whether your rims and brakes have already cooled down slightly. Why it is important that your rims are not hot and wet, we have in this blog post treated.
After you have checked this, spray the rim cleaner generously onto the rim. Please don't be too frugal here. It is important that the entire rim is sprayed so that the rim cleaner can reach every part.
Most rim cleaners have an exposure time of approx. 3 minutes and an effectiveness indicator. Effective indicator means that the cleaner on the rim turns purple as soon as the rim cleaner has developed its full power.
Why does a rim cleaner discolour?
The reason for this is very simple: the wheel rim cleaner has a so-called "effective indicator". This means that as soon as the cleaner starts working, an indicator will show up. The indicator in this case is the purple discoloration. The rim cleaner only works when it binds brake dust. Since the worst dirt on the rims is the brake dust, it can very well be that the rims even turn dark purple after the exposure time of approx. 3 minutes.
After the wheel rim cleaner has developed its full power, it should be rinsed off the wheel rim. You can do this very easily by rinsing the rim clean with the high-pressure cleaner. When working with the high-pressure cleaner, the general rule is that you should keep as much distance to the paintwork or rim as you can bear with your hand without it hurting.
Step 2: Dissolve brake dust
Now that the rim cleaner has started to take effect after a short exposure time, we can decide whether we want to give it a little extra help. We make this decision dependent on how long we have not cleaned our rims.
You can use the following as a guide:
If you haven't cleaned the rims for more than two weeks, you should use an additional tool to achieve a really good result.
A suitable tool can be either a rim brush or a rim brush. You use this to mechanically dissolve the brake dust that has already been attacked by the rim cleaner. If possible, dab the brush or rim brush in a little water and work off the entire rim.
It is important that you work your way through spoke by spoke so that you achieve the best effect.

As you can see in the picture above, a rim brush fits very well between the spokes of your rim and can therefore also be optimally used to clean the rim bed.
The material of the rim brushes is of course chosen in such a way that no damage occurs when they come into contact with your rim and the application is therefore safe. That's why you don't have to worry.
Basically, we always recommend a combination of a rim brush and a rim brush. This ensures that you really get to all the places.
Also look at the following video, where such a Rim brush from WorkStuff shown and described in more detail.
Step 3: Rinse the rims
Since we have done a good preparatory work, we don't have to do so much in the last step. Here it is only a matter of rinsing the rims clean with the high-pressure cleaner.
As always, keep your distance from the rim and take your time rinsing.
Of course, the last step is the most fun, because we can now see the result of our work immediately and the rim finally shines again in its splendour.
And was that it?
Yes, theoretically yes. That was it. You've seen that wheel rim cleaning isn't much magic. In a next blog post we will look at cleaning the tires and reconcile this with cleaning the rims.
Feel free to write us in the comments how you proceed when cleaning the rims and what we may have forgotten. What are your favorite products and do you have any questions?


